Hello everyone! Today's post is about a sailor bomber jacket I made in Fall 2016. This project was one of my most successful makes and I wear it all the time. I used a vintage McCall's pattern (number 6236), purchased right before the major pattern companies released their bomber jacket patterns that season. Read more below to see how I did it!
This was made for a sewing class I took at school, but I also had the idea in mind for a while. I bought the pattern on Ebay in September 2016 and completed the jacket in November 2016. I learned so much in the process, and I like to think my skills have improved greatly as a result.
This was made for a sewing class I took at school, but I also had the idea in mind for a while. I bought the pattern on Ebay in September 2016 and completed the jacket in November 2016. I learned so much in the process, and I like to think my skills have improved greatly as a result.
ALTERATIONS
 |
| Here's what the pattern looks like! But the specific pattern I purchased was a size Medium (36, 38). |
The pattern was perfect for what I had in mind. It came with a basic oversized bomber/varsity jacket pattern. Because the size I bought was a size medium, which looked to be slightly too small for my measurements, it was easy to add about a half inch to the side seams and sleeve. Due to the oversized nature of the garment, exact fit wasn't necessary.
As is, the jacket patterns are unlined, so it was necessary to draft both the sailor collar and lining. This wasn't too bad, but it was my first time making such drastic adjustments. I then made a simple muslin, but didn't need to make anymore adjustments afterwards.
Overall, this project wasn't too hard to sew. However, it was my first time sewing with rib knit trim and a lining with sleeves attached. The rib knit trim proved pretty easy to sew with, and it was fun to learn how to sneakily attach the lining to the cuffs and inside of the jacket without having to hand sew any part of the sleeves. These skills have proved invaluable to me in all my other jacket sewing experiences.
Both the lining and main fabric are from JoAnn's (as well as the twill tape used on the sailor collar); the striped rib knit trim is from Mood Fabrics.
As is, the jacket patterns are unlined, so it was necessary to draft both the sailor collar and lining. This wasn't too bad, but it was my first time making such drastic adjustments. I then made a simple muslin, but didn't need to make anymore adjustments afterwards.
THE PROCESS
 |
| My favorite "helper" overseeing the cutting process. (He normally looks more friendly.) |
Overall, this project wasn't too hard to sew. However, it was my first time sewing with rib knit trim and a lining with sleeves attached. The rib knit trim proved pretty easy to sew with, and it was fun to learn how to sneakily attach the lining to the cuffs and inside of the jacket without having to hand sew any part of the sleeves. These skills have proved invaluable to me in all my other jacket sewing experiences.
Both the lining and main fabric are from JoAnn's (as well as the twill tape used on the sailor collar); the striped rib knit trim is from Mood Fabrics.
THOUGHTS ON WEAR AND TEAR
Because I made this garment over a year ago, I'm able to reflect on some fabric choices and other decisions that could be improved. I decided not to interline the fabric, which I still believe is a good choice. The weather here in Texas doesn't really necessitate thicker fabrics.
However, I really should have selected a tougher gabardine or other type of fabric. The fabric has snagged pretty heavily, pilled under the sleeves, and has a few pulled threads in areas where friction occurs (where I wear my backpack straps, for example). Even so, I usually walk over three miles a day on campus, so the wear and tear hasn't been too bad given I wear it all the time.
This jacket is probably my favorite piece for myself I've ever made. It may not be the most technically complex, but I've gotten a heavy amount of use out of it.

Thanks for reading! Let me know down below if you have any questions.
However, I really should have selected a tougher gabardine or other type of fabric. The fabric has snagged pretty heavily, pilled under the sleeves, and has a few pulled threads in areas where friction occurs (where I wear my backpack straps, for example). Even so, I usually walk over three miles a day on campus, so the wear and tear hasn't been too bad given I wear it all the time.
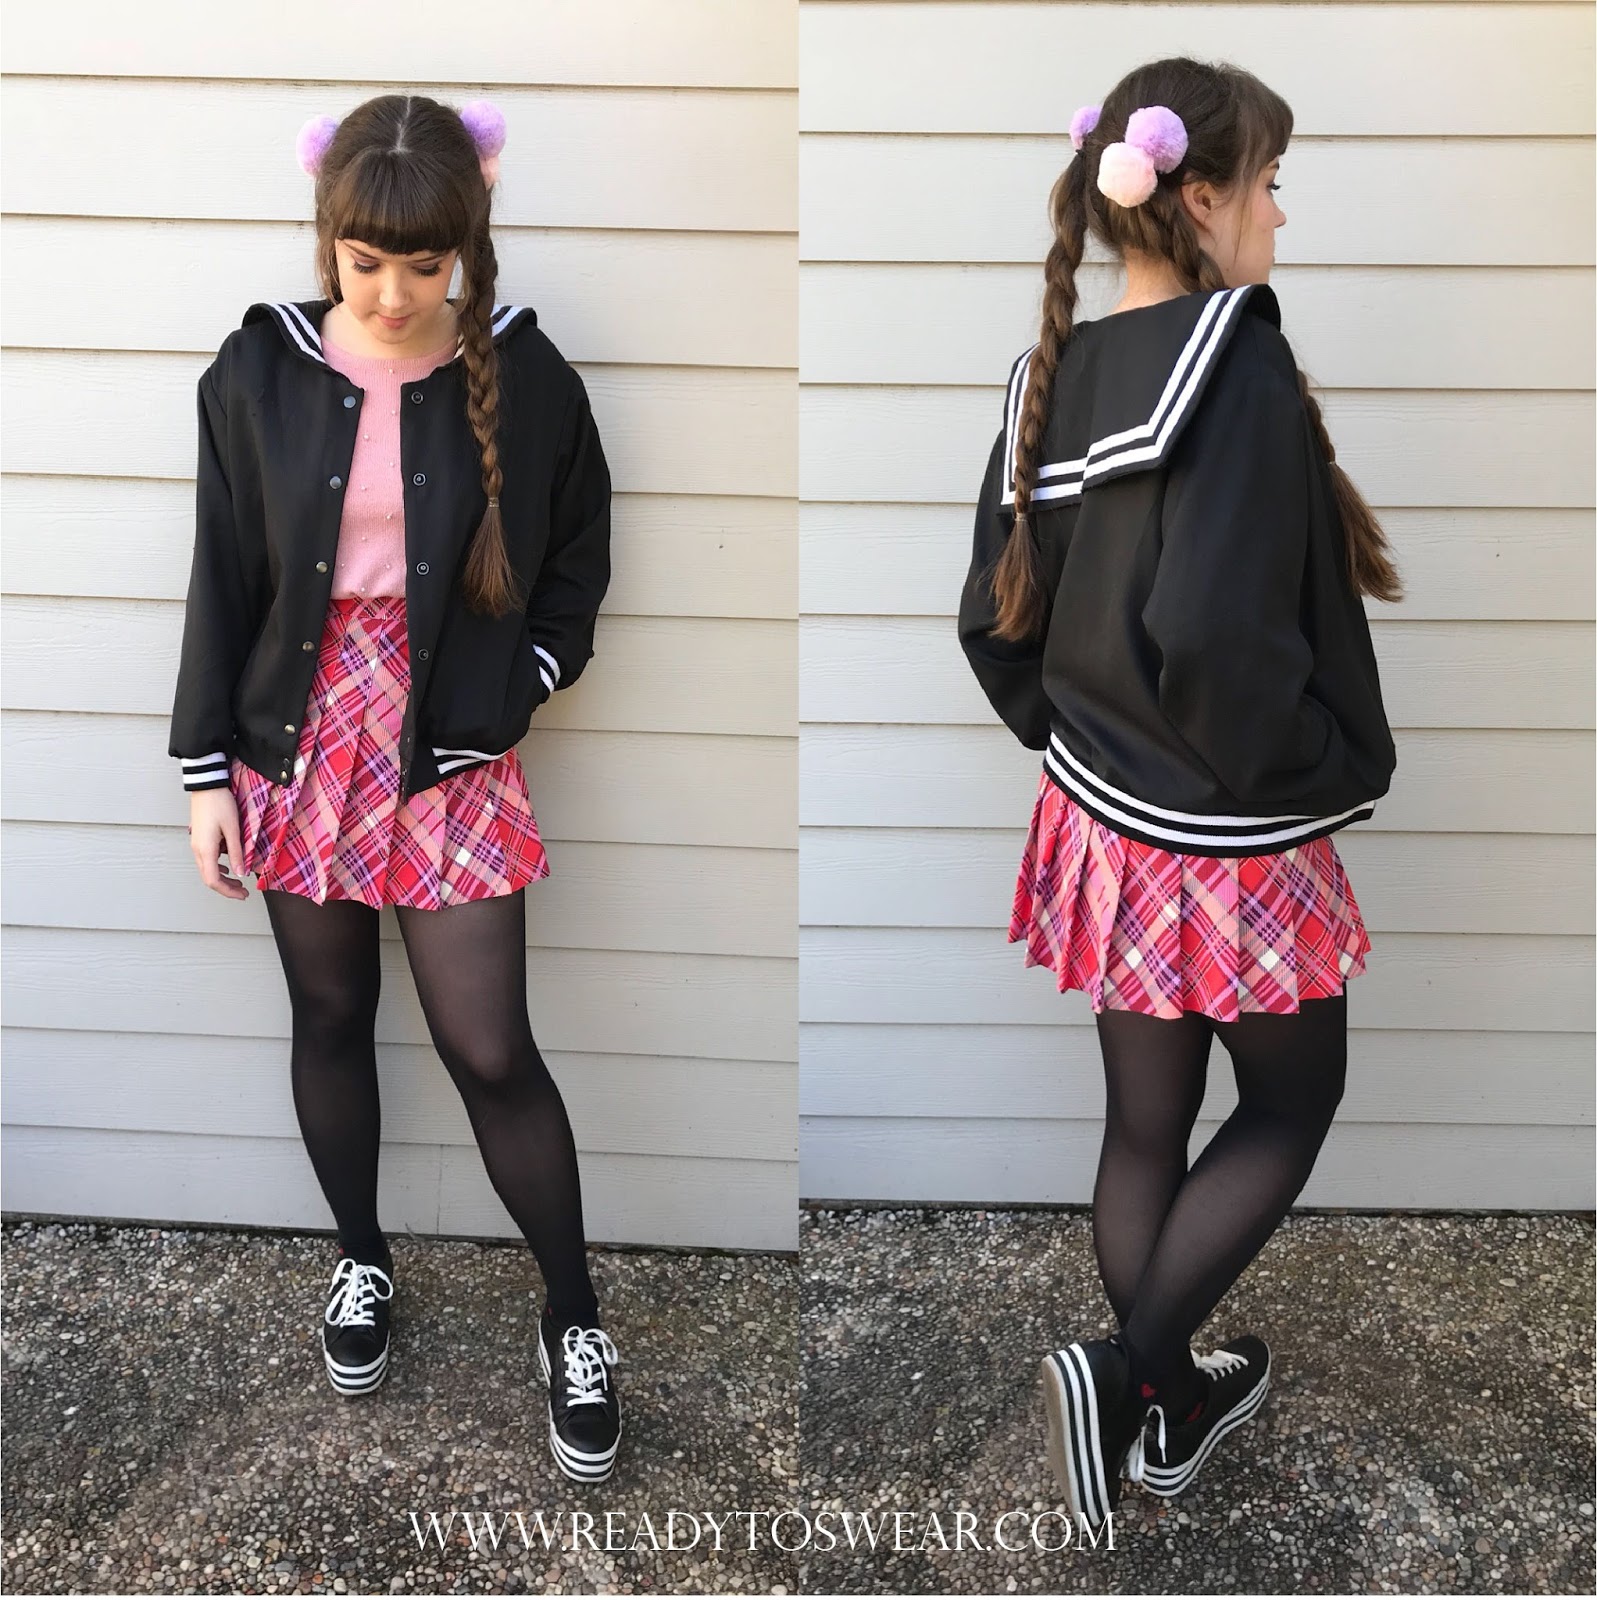
THE FINAL RESULT
Here's the final outcome!
 |
| Sorry for the blurry image quality; I lost the originals of these photos somewhere in the shuffle of transferring phones in late 2016. |
 |
| Here's a look at the lining. |
Thanks for reading! Let me know down below if you have any questions.
Wow...such a cute jacket. I love anything sailor collared.
ReplyDeleteThank you so much for the nice comment! I love sailor collars as well.
DeleteLoved this post! The sailor bomber jacket turned out so cute and your alterations were genius! The rib knit trim adds a nice touch. It's inspiring to see your journey and how you've honed your sewing skills. Keep up the fantastic work!
ReplyDeleteThank you so much for your kind words! I'm always hoping my blog will be useful to others.
Delete