
This past December I decided to join Bluprint's streaming service. I had previously purchased a few Craftsy classes, and the end of the year deals were tempting enough for me to subscribe for a year. As a result, I stumbled upon Alison Smith's corset making class. The techniques shown were practical and valuable, and I considered purchasing the pattern used in the class. However, I couldn't see myself ever wearing it, as I never really wear shapewear. So, in summation, I wanted to challenge myself and make a corset, but I didn't want to invest hours of time and effort into a typical corset.
The release of Butterick 6643 coincided perfectly with this dilemma. It was a less "serious" corset that I could potentially see myself wearing. So, today's post will be about my experience trying out this pattern. Be forewarned, however, because this project is a little bit of a fail.

The Pattern
 |
| Link to the Butterick's info here |
The Process
 |
| As usual, I had help from the best. (apologies for the messy table) |
For the most part, the construction was fairly straightforward. As I'm unfamiliar with corset making, I followed the pattern instructions closely.
I used a white herringbone coutil for most of the corset and white power mesh for the side panels. I picked up a generic lingerie elastic at Joann Fabrics to finish the upper and lower edges.
The corset front and back pieces (not the mesh panels) are self lined. Sew-in interfacing is used to baste stitch the casings. The lining pieces are slipstitched on top. This was all fairly simple.

The corset front and back pieces (not the mesh panels) are self lined. Sew-in interfacing is used to baste stitch the casings. The lining pieces are slipstitched on top. This was all fairly simple.
The mesh side panels presented some challenges. First you sew the two mesh pieces together, and then the coutil side piece is sewn on to connect the front and back. Afterwards, twill tape is applied to create a casing for the boning. This worked reasonable well, although the mesh can slip or slide easily if caution is not taken.

Other than the mesh, the corset sews up easily.

I chose to set the eyelets before applying the boning so I could more easily create the holes. This is one area where I veered away from the pattern instructions.

Other than the mesh, the corset sews up easily.
I chose to set the eyelets before applying the boning so I could more easily create the holes. This is one area where I veered away from the pattern instructions.
This project was my first time using proper steel boning. Following advice from Alison Smith's Bluprint class, I used a combination of spiral steel and white covered steel. I used the white steel for the back near the eyelets (to prevent movement) and on the side seams (to prevent visibility underneath the mesh). Everywhere else, I used flexible spiral steel.
A few difficulties arose using the steel boning. I ordered the boning based off estimates I measured from the pattern before sewing. I needed to trim some pieces down. I purchased tips for the steel, but had some trouble using pliers to squeeze the ends. No matter what I tried, I was still able to pull the tips off. So, I pressed them to the best of my ability with Teflon tape. Was this a good strategy long-term? Only time will tell.
For the white steel, I use wire cutters to cut and trim the pieces, and then I applied silicone to the ends to seal them. I had read online that Plasti-dip may be used, but I found that this worked okay in its place.
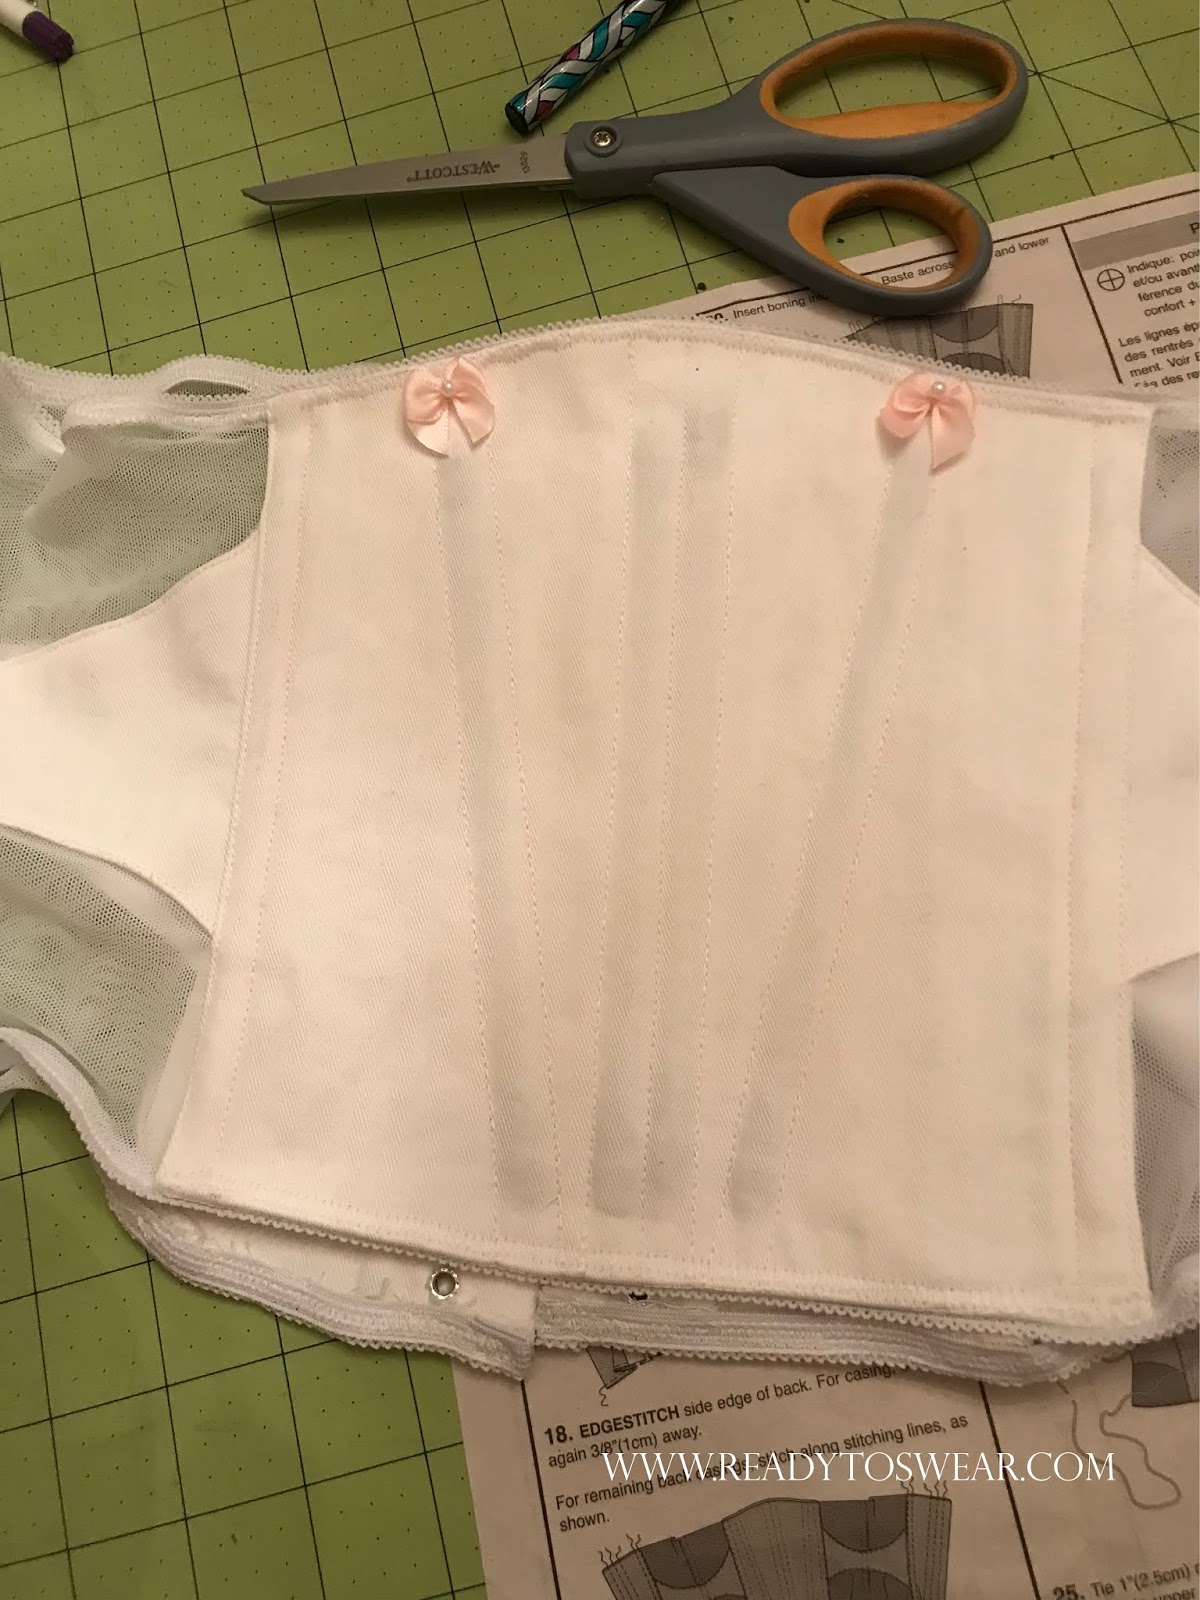
 Here's what the corset looked like after adding the boning. Honestly, if i make this corset again, I would probably only use the white corset steel. The grey colored boning and the lumpy ends show through the corset a little bit.
The final step was applying the lingerie elastic. This step was the hardest for me personally, and I feel like it made the corset look a little worse than it should have.
The pattern instructions simply say to apply the elastic using a zig zag stitch. This created difficulties, because the fabric is too thick for my sewing machine when folded over. Also, I wasn't sure how exactly to sew the mesh. I chose to use 1/4" elastic rather than the recommended 3/8" elastic, so perhaps this is where I went wrong. (But I chose to do so because the 3/8" elastic looked as though it would interfere with the eyelets.) Maybe I'll try using a coverstitch machine next time.
I think my zig zag stitching looks a little lumpy in the end. This is one of the more disappointing things about my final result.
A few difficulties arose using the steel boning. I ordered the boning based off estimates I measured from the pattern before sewing. I needed to trim some pieces down. I purchased tips for the steel, but had some trouble using pliers to squeeze the ends. No matter what I tried, I was still able to pull the tips off. So, I pressed them to the best of my ability with Teflon tape. Was this a good strategy long-term? Only time will tell.
For the white steel, I use wire cutters to cut and trim the pieces, and then I applied silicone to the ends to seal them. I had read online that Plasti-dip may be used, but I found that this worked okay in its place.
 |
| Not the best lighting. |
The final step was applying the lingerie elastic. This step was the hardest for me personally, and I feel like it made the corset look a little worse than it should have.
The pattern instructions simply say to apply the elastic using a zig zag stitch. This created difficulties, because the fabric is too thick for my sewing machine when folded over. Also, I wasn't sure how exactly to sew the mesh. I chose to use 1/4" elastic rather than the recommended 3/8" elastic, so perhaps this is where I went wrong. (But I chose to do so because the 3/8" elastic looked as though it would interfere with the eyelets.) Maybe I'll try using a coverstitch machine next time.
 |
| The elastic looked better before being topstitched down, I think. |
Likes and Dislikes
Be forewarned: Like many Big 4 patterns, this pattern has an astronomical amount of extra ease. This was one area where I majorly screwed up. In fact, this corset ended up so large I can't really wear it for its intended use. It can be laced up around me, but it can't actually be pulled any to bring in my waist. So, it really just adds extra padding to my waist. I honestly should have known better. I made a size 16, which is generally close to my true measurements. But, every time I've cut a size 16, it's been too large around the waist. I would have drafted a size 14 or 14 1/2, but I was worried it would be too tight, and I didn't want to completely strangle my waistline. Oh well! I have enough fabric left over to make another one if I want to.
My only real gripe with the pattern itself is the fact that the corset Gertie is wearing on the front is slightly different than the pattern itself. This may be a nitpick, but the pattern depicted has only one casing down the center front, whereas the pattern itself has two casings (I even zoomed in on the official Butterick photos to check). There isn't an option to have only the one. This is an easy issue to fix on your own, but it appears to be a discrepancy between the sample made and the pattern published.
As this pattern is a commercial Big 4 pattern, the instructions are not particularly beginner friendly. For example, there are no real clear instructions for the type of boning that should be used or how to trim the boning once you have it. There are also no explicit instructions for zig zagging the trim. But this is not a criticism of this pattern in particular; it's just something to keep in mind. Indie patterns, on the other hand, will often have helpful sew-alongs or material guides. I never pay more than $1-2 for commercial patterns though, so I don't have much room to complain! I still thoroughly enjoy using them.
As this pattern is a commercial Big 4 pattern, the instructions are not particularly beginner friendly. For example, there are no real clear instructions for the type of boning that should be used or how to trim the boning once you have it. There are also no explicit instructions for zig zagging the trim. But this is not a criticism of this pattern in particular; it's just something to keep in mind. Indie patterns, on the other hand, will often have helpful sew-alongs or material guides. I never pay more than $1-2 for commercial patterns though, so I don't have much room to complain! I still thoroughly enjoy using them.
All of that being said, I do like several things about this pattern. It's more aesthetically appealing to me than most corsets, and it's lacking a busk or front zipper which would have made it more difficult and time-consuming to sew. It didn't take too long to complete, and it's a good starter pattern (other than the issues mentioned above).
Final Thoughts
 |
| Another look at the finished result. |
Thanks for reading this far! Overall, I don't think this project was the worst attempt, but I am a bit disappointed. While it doesn't look too bad, it simply does not fit properly. I can potentially retry this pattern again in the future (provided I have the energy).
Happy sewing! If you have any questions, please let me know!
To view some of my other pattern reviews, click here.
No comments
Post a Comment