 |
| Photographer: Ed Lehmann Models (L-R): Claren Moyers, Carly Morris, Abby Richards |
Hello everyone! Today's post will outline my senior collection that I completed this past spring semester. My collection was presented as part of the UT Dimensions Fashion Show, which aired live on ESPN's Longhorn Network. Click below to see all the details!
This three-piece collection was the culmination of several years work during my time at the University of Texas. Each student's collection was the main focus of the overall fashion show, and we spent the spring semester working on our collections.
 |
| Photographer: Photos from Elrick |
To view a video of the show, click
here. My collection starts at 28:16, but I suggest watching through everyone's collection.
Initially it was my intention to split my collection posts into three parts, but I think the garments look best side by side.
 |
| Photo from Fashionably Austin |
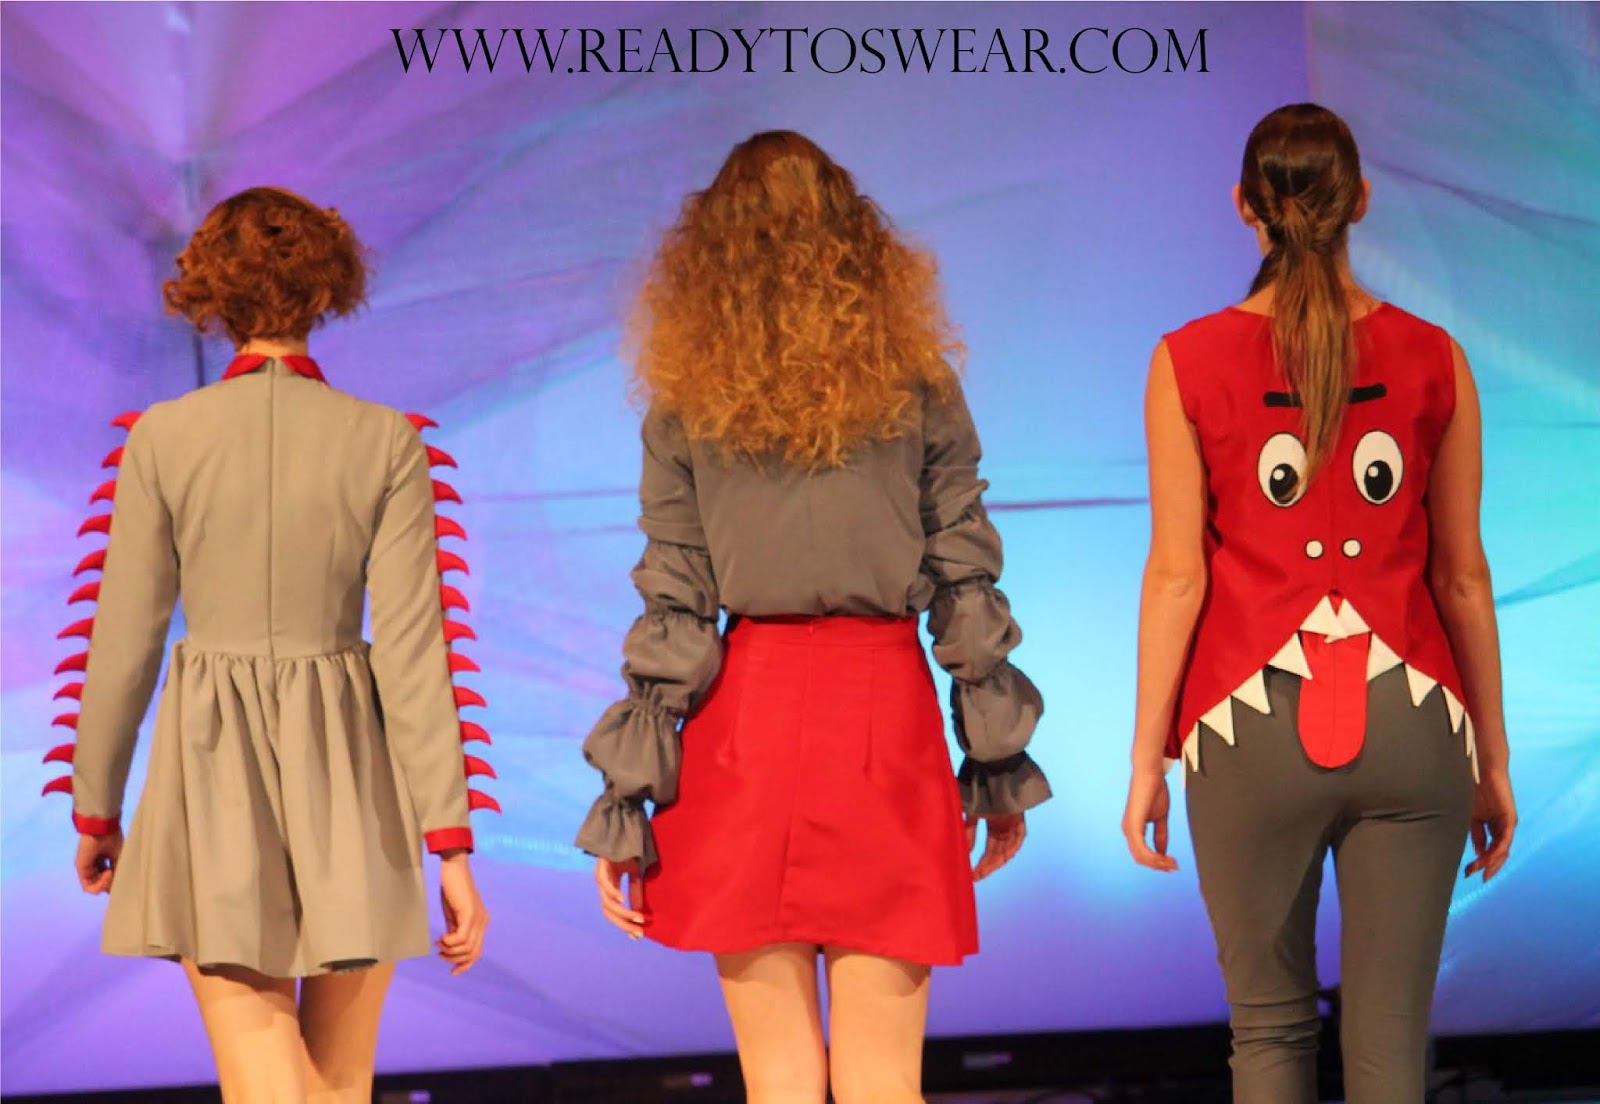
The inspiration for my collection was monsters and monsters from vintage movies. I wanted to keep the colors in shades of grey with pops of red. I had a ton of fun adding in the faces.
 |
| Photographer: Ed Lehmann |
We also had to complete one group project this semester for the show. For the group project, we were tasked with creating an activewear look for the UT Coop, one of the show's biggest sponsors. We chose to go with a vintage tennis look. At some point I may recreate this look for myself (if I ever have time, of course).
 |
| Photographer: Ed Lehmann Model: Haoquing Geng |
Some of my previous work from last fall also walked down the runway!
Here's the
cat sitting look I created last fall from recycled garments.
 |
| Model: Taylor Courtney |
Here's the
evening dress I made last semester!
That's pretty much it as far as just runway pictures go!
If you're interested in knowing more about the process involved with developing this collection, keep reading! If not, stay tuned for the next post.
THE PROCESS
This look was obviously inspired by monsters and mysterious creatures. This is the inspiration board I used for the collection.
And here's the final drawings I ended up with!
The following pictures depict how I created the garments themselves. The top and skirt look was draped, while the spikey-sleeve dress and leggings were drafted on paper first.
The Wrap Skirt
 |
| The first drape of the wrap skirt! Sorry for the crooked photo. |
 |
| Belt for the side skirt! |
One of my favorite parts of creating this collection was making this belt! It was my first time actually using a cover buckle kit, something I had wanted to do for a long time. I found
this tutorial from Sew Mama Sew to be very helpful.
 |
| Here's what it looked like when sewn into the skirt! |
 |
| I realize this picture probably isn't the most flattering; I promised I pressed it after! |
I chose to finish the back with an invisible zipper! I was happy that everything lined up (for the most part) in the end.
The Bubble Sleeve Top
Making the first draft of the sleeve! I added in fullness after the first draft.
 |
| Mock up of the sleeve next to the rest of the blouse. |
I completed the face first before anything else. I used fusible web, as I did in previous projects. Would anyone be interested in a tutorial on how to do this? I've used this technique for many projects now.
I used elastic to create the sleeve texture.
The Reversible Monster Top
 |
| I first drew the face in Illustrator and used a fusible web. |
I started out creating the face on each side of the top. After stitching down the faces, I sewed a separating zipper into both the front and back.
After that I added the teeth to each side around the edge and sewed the top together.
 |
| Before the snaps were sewn on! I know the top looks pretty wrinkly here. |
Then, I added the detachable tongue to the back face. I didn't take a picture, but there are small snaps to attach the tongue to the face.
I could add a few more progress shots, but I'll end the post here!
I want to remake several of these looks! Who knows if that will ever actually happen, considering all the other projects I have lined up to get done.
Thank you so much for reading this far! This summer is very busy for me, but I'll have some posts out in July. Let me know if you have any questions down below!
xoxo Anna Kate


 And here's the final drawings I ended up with!

 I completed the face first before anything else. I used fusible web, as I did in previous projects. Would anyone be interested in a tutorial on how to do this? I've used this technique for many projects now.
 I used elastic to create the sleeve texture.


No comments
Post a Comment